


|
|
2 years ago | |
|---|---|---|
| .vscode | 2 years ago | |
| doc | 2 years ago | |
| images | 2 years ago | |
| src | 2 years ago | |
| stl | 2 years ago | |
| README.md | 2 years ago | |
| thermi2c.pro.user | 2 years ago | |
README.md
thermi2C - a thermal camera app for the jolla 1 phone
This is an app used to interface a cheap melexis MLX90640 thermal camera (~35€ for the sensor) with a Jolla 1 phone, using the phone's built-in I2C bus.
Note that the app is closer to a tech demo than a full thermal camera driver app, it can't do temperature readings just yet, or pictures, all you get is a direct view of the thermal sensor at ~11fps (due to I2C bus speed limitations on this phone). But at least you get quite a few themes for color :)
screenshots
regular mode
| old ui | new ui |
|---|---|
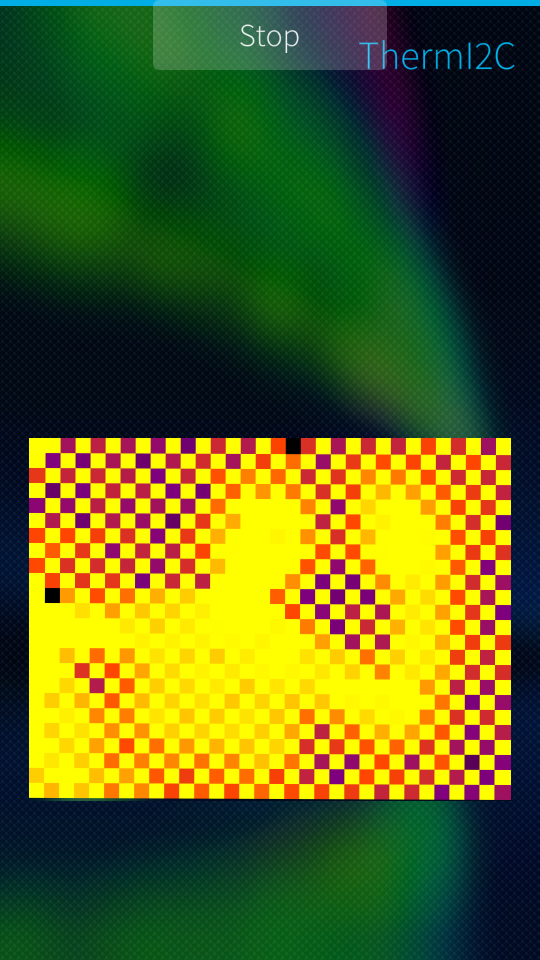 |
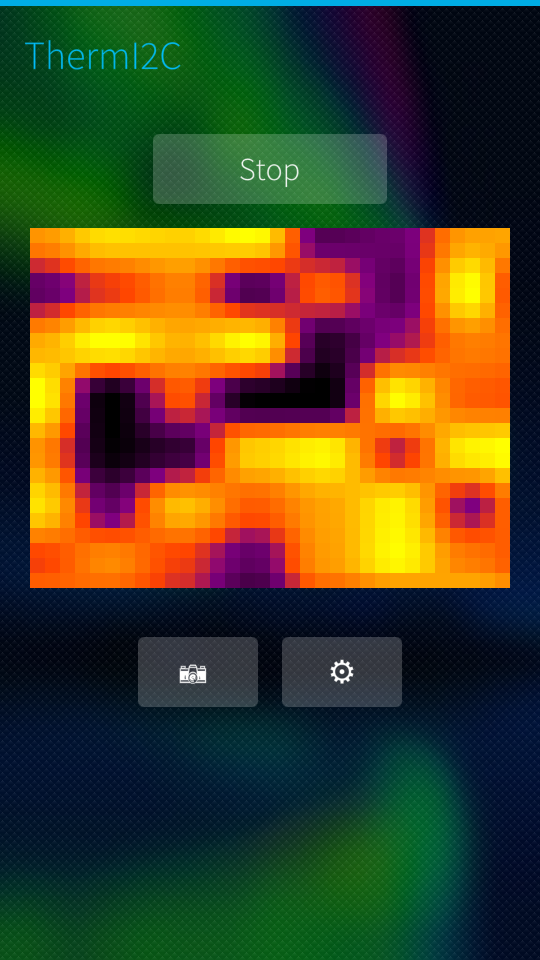 |
a photo can be taken by tapping the camera button, it will be upscaled by a factor of 5 from 32x24 to 160x120
options screen:
This app has an options screen openeded by tapping the gear icon:
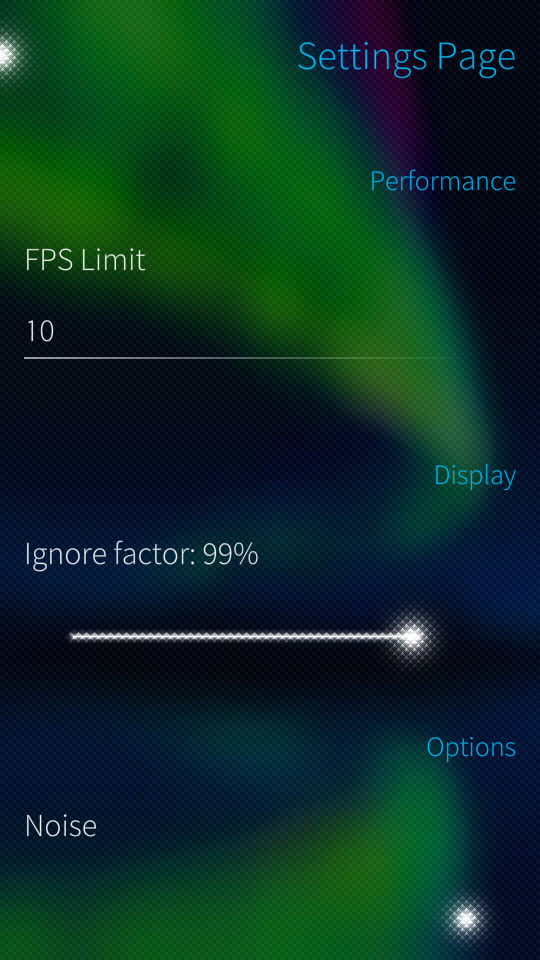
The 3 options here are as follows:
- Fps limit: self explanatory, don't put a value higher than 10-15 because of performance issues on the UI side (blame the 32x24 squares to update...)
- ignore factor: set the thermal renderer's "ignore" treshold, measining it will ignore and flatten XX% of the values on the high and low side, useful if you have "hotspots" you don't want to see to be able to concentrate on a less hot point
- Noise, replaces the #define IGNORE_I2C_DISCONNECTS in the code and should control wether or not noise will be generated when the camera is working.
demo mode
The app also has a demo mode for when the sensor fails/ isn't connected, it'll display perlin noise on the UI where the thermal view should be.
| theme hotiron | theme gray |
|---|---|
 |
 |
what is being said here is no longer valid (oudated):
note: leaving the noise generation on can cause issues with the normal mode of operation (flashing), so this line needs to be commented for the demo mode to be available:
#include <stdint.h>

#define IGNORE_I2C_DISCONNECTS  //comment out this line to enable noise generation / demo mode

class MLX90640 : public QObject
Found in mlx90640_API.h line 92
credits
This app uses code from these other repos:
https://github.com/kimmoli/i2ctool
(used for some of the I2C code, but largely reworked to maximize byte capacity and speed)
https://github.com/melexis/mlx90640-library
(used for most of the thermal sensor logic, also modified and objectified [C -> C++])
this app was developped in its enteriety by me, Yorick.
hardware
You'll need a jolla 1 phone (2014)
The 5V and INT pins on the phone are unused, here's the wiring:

(N means unused here, i didn't bother to mark the 5V pin). I used some nickel strips to contact witht he pogo pins, this works quite well, a soldering iron can be used to melt the pins into their proper position.
Some parts of the case are open, if you don't like this you can edit the fusion 360 project i dropped in ./stl/ and make your own.
i usually get my sensors from there (MLX90640ESF-BAA):
https://fr.aliexpress.com/item/1005004645739586.html
Compiling the app
As for the SDK setup, you'll need the sailfish SDK (latest), and this is important: with version 3.4.0 OS target, which is the latest one the jolla 1 phone supports (or you can use your phone's current version if you don't want to update to 3.4).
the sdk here: https://docs.sailfishos.org/Tools/Sailfish_SDK/
for debugging i highly recommend this, to at least check that the camera IS connected and responding:
https://github.com/kimmoli/i2ctool
Probe with it, address 33 should light up green. If it doesn't either you wired it wrong or your camera's dead.
this app can also be installed directly from the jolla store, easier to get working imo.
Happy hacking!
Licensing
this app uses the standard GPL V3 licence found here: https://www.gnu.org/licenses/gpl-3.0.en.html#license-text
formatted readme
this part of the readme if formatted following an evalutation grid, ignore it if you just want to use the app:
Descriptif
Thermi2c est une application qui utilise la fonctionnalité TOH du jolla 1 pour connecter, contrôler et afficher la vue d'une caméra thermique MLX90640
Usage
Il suffit de démarrer l'application, elle s'occupe automatiquement d'activer le VDD de la TOH et de se mettre en mode démo si elle ne trouve pas la caméra thermique.
Techniques de programmation utilisées
Modèle
boucles
Les boucles dans cette application n'utilisent pas de QTimer déjà faits mais utilisent un timer threadé custom. Ce timer prend une durée de timeout et une Command abstraite à exécuter à l'issue du timeout. Si le timeout est dépassé le timer exécute la Command en flux tendu (pas de délai, mais pas de sur-exécution).
driver melexis
La caméra dispose d'un driver en C offert part melexis, ila été objectifié et retravaillé pour fonctionner avec le téléphone.
driver I2C
Le driver I2C est largement inspiré de celui de l'outil communautaire de contrôle de la TOH I2C toolkit. Le code a été quasiment entièrement refait pour être plus efficace, supporter le chunking et l'écriture random dans un environnement d'adressage 16 bits (la caméra utilise des registres 16 bits). Les méthodes Read et Write d'i2cif ont ainsi été refaites.
UI
thêmes
Une liste sillica pull-down est utilisée pour changer les couleurs de la vue thermique, ces couleurs sont définies par des ColorAttributer dans le modèle qui contiennent plusieurs QColor liées à une valeur entre 0.0 et 1.0. Post-normalisation des valeurs de la caméra thermique (X-> y à 0.0 -> 1.0), ces couleurs sont interpolées pour créer la vue finale à travers le thermalRenderer, qui va utiliser le colorAttributer actif pour colorer les données.
Capture
Il est possible de capturer la vue graphique actuelle via un bouton, elle sera alors upscale à 160x120 pixels avant d'être sauvegardée dans la gallerie (bouton appareil photo)
paramètres
Une fenêtre de paramètres peut être ouverte en appuyant sur le bouton ⚙️. Cette fenêtre modifie les paramètres de FPS max (10 conseillé), taux "d'aplatissement" des données thermique (0->50%), et ceux de génératiuon de bruit (mode démo). On n'utilise pas les QSettings pour éviter qu'une mauvaise config rende l'application inutilisable même après un redémarrage (paramètres de fps > 20...).
Bugs connus
pas vraiment un bug mais la performance côté UI est vraiment mauvaise, 32x24 rectangles à mettre à jour à chaque frame c'est trop, j'aurais dû créer une image de 32x24 pixels, et l'upscale à 320x240 avant de l'afficher, c'est très efficace et je sais que ça marche dans mon casque:
https://codefirst.iut.uca.fr/git/yorick.geoffre/ARHS-Thermx
Egalement l'algo de melexis pour enlever le damier crée par l'interlacing de l'image fonctionne de manière peu fiable... celui d'adafruit est mieux.
Précisions
Le fait que la fréquence de la TOH soit bloquée à 100khz et pas 400 comme recommandé par melexis empêche d'atteindre les hauts fps dont je sais ce capteur capable. Avec les limitations actuelles si l'ui était rendue plus efficace on pourrait atteindre ~20 fps (avant d'arriver aux limites pratiques de bandwith même avec chunking).